The most reliable way to install Docker on Ubuntu 24.04 is from Docker's own apt repository: add Docker's GPG key, register the download.docker.com repository with apt, and install five packages: docker-ce, docker-ce-cli, containerd.io, docker-buildx-plugin and docker-compose-plugin. Then add your user to the docker group, enable the service at boot, and verify the install with docker run hello-world. The whole thing takes under five minutes.
Below are those steps in detail, along with answers to the usual questions: how Ubuntu's own docker.io package differs from docker-ce, what the risk of the docker group is, and how to remove Docker completely if you ever need to. All commands are written for Ubuntu 24.04 (Noble), but they work unchanged on the other supported Ubuntu releases. If the server is brand new, work through the first hour on a new Linux server before installing Docker.
Short answer: To install Docker on Ubuntu 24.04, add Docker's GPG key and the official
download.docker.comrepository to apt, then installdocker-ce,docker-ce-cli,containerd.io,docker-buildx-pluginanddocker-compose-plugin. Verify withsudo docker run hello-world, and add your user to thedockergroup if you want to run Docker without sudo.
Before installing: remove old and conflicting packages
If you previously installed Docker from Ubuntu's repository or with another script, there may be packages on the system that conflict with the official version. This removes them; if none are installed, apt simply reports that they weren't found and nothing breaks:
for pkg in docker.io docker-doc docker-compose docker-compose-v2 podman-docker containerd runc; do
  sudo apt-get remove -y "$pkg"
done
This does not delete the images, containers and volumes in /var/lib/docker, so any data from a previous Docker install stays where it is.
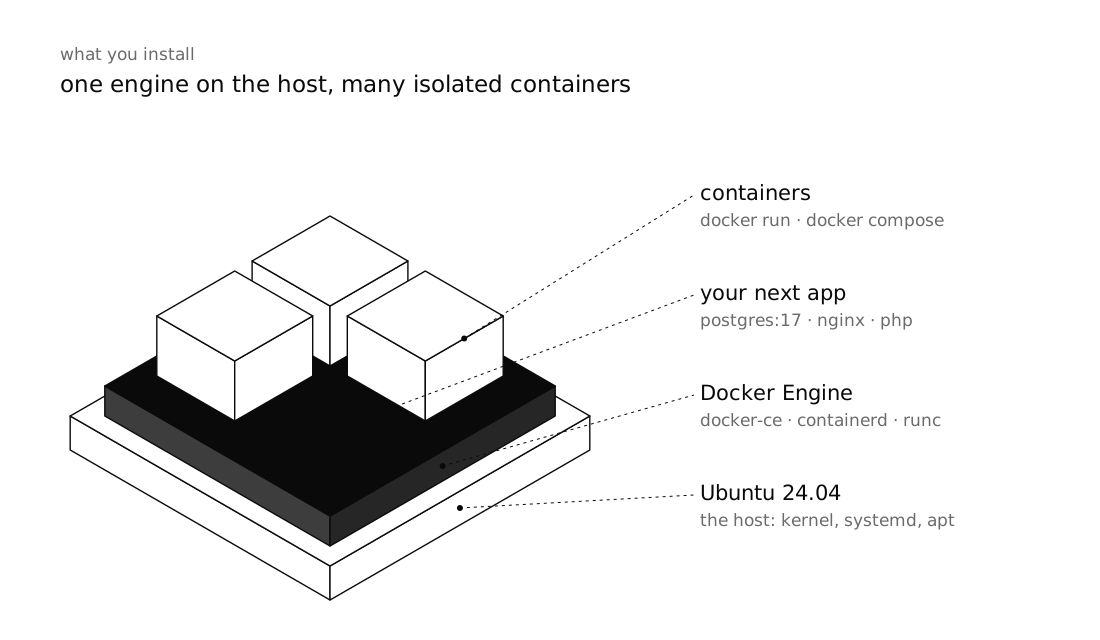
Install Docker Engine from Docker's official repository
1. Add Docker's GPG key
apt only accepts packages whose signatures verify against a trusted key. Put Docker's key in the standard /etc/apt/keyrings location:
sudo apt-get update
sudo apt-get install -y ca-certificates curl
sudo install -m 0755 -d /etc/apt/keyrings
sudo curl -fsSL https://download.docker.com/linux/ubuntu/gpg -o /etc/apt/keyrings/docker.asc
sudo chmod a+r /etc/apt/keyrings/docker.asc
2. Add the repository to apt
On Ubuntu 24.04, the deb822 format (files ending in .sources) is the default. The release codename (noble) is read from the system itself, so nothing is hard-coded:
sudo tee /etc/apt/sources.list.d/docker.sources > /dev/null <<EOF
Types: deb
URIs: https://download.docker.com/linux/ubuntu
Suites: $(. /etc/os-release && echo "${UBUNTU_CODENAME:-$VERSION_CODENAME}")
Components: stable
Signed-By: /etc/apt/keyrings/docker.asc
EOF

sudo apt-get update
If apt-get update reports a signature error or NO_PUBKEY, the key file didn't download correctly or isn't readable; rerun the last two commands of the previous step.
3. Install the packages
sudo apt-get install -y docker-ce docker-ce-cli containerd.io docker-buildx-plugin docker-compose-pluginEach package has a specific job:
| Package | What it does |
|---|---|
docker-ce |
Docker Engine itself, the dockerd daemon |
docker-ce-cli |
The docker command you use to talk to the daemon |
containerd.io |
The underlying runtime that actually runs containers |
docker-buildx-plugin |
The image builder (BuildKit) behind docker build |
docker-compose-plugin |
The docker compose command for running multiple services from one file |
The Docker service starts automatically after installation. Check it:
sudo systemctl status docker --no-pager
docker --version
docker compose version
Verify the installation with hello-world
The simplest test is to run the official hello-world image:
sudo docker run hello-worldThis pulls the small hello-world image from Docker Hub, creates a container from it, and the container prints a message and exits. If you see Hello from Docker!, the whole chain works: the CLI reached the daemon, the daemon pulled the image, and containerd ran the container.
The container stays behind in the Exited state. To clean up:
sudo docker ps -a
sudo docker rm $(sudo docker ps -aq --filter ancestor=hello-world)
sudo docker rmi hello-world
Post-installation steps
Run docker without sudo
By default, only root can access the Docker socket (/var/run/docker.sock). To let your own user run Docker without sudo, add it to the docker group:
sudo groupadd -f docker
sudo usermod -aG docker "$USER"
Group membership takes effect at your next login: log out and back in (or run newgrp docker in the current session). Then try:
docker run --rm hello-worldAn important security note: membership in the docker group is effectively root. Anyone with access to the Docker socket can start a container that mounts the host's entire filesystem and do whatever they like with it. Only add users you would also trust with root. If that isn't acceptable, Docker's rootless mode is the next option to look at; it's documented on docs.docker.com.
Start Docker on boot
On Ubuntu, services are usually enabled on installation, but being explicit doesn't hurt:
sudo systemctl enable docker.service
sudo systemctl enable containerd.service
After every reboot, Docker comes back up, and so do containers with restart: unless-stopped or --restart unless-stopped.
Limit container log size
Docker's default log driver (json-file) has no size limit, and a chatty container can fill the disk in a few weeks. Set a global cap in /etc/docker/daemon.json:
{
  "log-driver": "json-file",
  "log-opts": {
    "max-size": "10m",
    "max-file": "3"
  }
}sudo systemctl restart dockerThis only applies to containers created from now on; existing containers need to be recreated once.
Docker and the ufw firewall
This one catches a lot of people out: for ports you publish with -p, Docker writes iptables rules directly, and those rules are evaluated before ufw's. So if you write -p 5432:5432, your database port is open to the internet even if ufw blocks it.
The simple fix is to publish services that shouldn't be reachable from outside on localhost only:
docker run -d -p 127.0.0.1:5432:5432 --name db -e POSTGRES_PASSWORD=change-me postgres:17For services that only need to talk to each other, don't publish ports at all; put them on a shared Docker network. That's exactly what we do in Docker Compose explained.
docker.io vs. docker-ce
Ubuntu's own repository has a package called docker.io, and people often ask why not just install that. Both are Docker Engine, but from different sources:
docker.io |
docker-ce |
|
|---|---|---|
| Source | Ubuntu repository | Docker's official repository |
| Maintainer | Ubuntu/Debian | Docker, Inc. |
| Version | Fixed for the life of the Ubuntu release, security patches only | Latest stable, updated regularly |
| Compose | Separate docker-compose-v2 package |
docker-compose-plugin |
| Buildx | Separate package, usually behind | docker-buildx-plugin |
docker.io isn't bad; if stability and updates through Ubuntu's own repository matter more to you, it's a reasonable choice. But Docker's documentation, examples online and new Compose and Buildx features track the official release, and for most modern work docker-ce causes less friction. Most importantly, don't install both; that's why we removed the conflicting packages at the start.
Updating Docker
Because Docker was installed from an apt repository, it updates with the rest of the system:
sudo apt-get update
sudo apt-get upgrade
Upgrading Docker Engine restarts the daemon, so running containers stop and (if they have a restart policy) start again. On a production server, do it at a time when a few seconds of downtime is acceptable. If you don't want unattended-upgrades updating Docker behind your back, hold the packages and upgrade manually:
sudo apt-mark hold docker-ce docker-ce-cli containerd.ioUninstalling Docker completely
To remove the packages:
sudo apt-get purge -y docker-ce docker-ce-cli containerd.io docker-buildx-plugin docker-compose-plugin docker-ce-rootless-extrasImages, containers and volumes are still on disk after this. If you really want everything gone, and you're sure there's no data you need in your volumes, delete these too:
sudo rm -rf /var/lib/docker /var/lib/containerd
sudo rm /etc/apt/sources.list.d/docker.sources /etc/apt/keyrings/docker.asc
A database running in a container kept its data in /var/lib/docker/volumes. If in doubt, take a backup before running this; the 3-2-1 backup rule explains why one copy isn't enough.
Frequently asked questions
Do I need to install Docker Compose separately?
No. Installing the docker-compose-plugin package from the official repository makes Compose available as the docker compose subcommand (with a space). The old docker-compose command (with a hyphen) is the deprecated version 1 and is no longer needed.
How do I check that Docker is installed correctly?
Run sudo docker run hello-world. If it prints Hello from Docker!, the CLI, the dockerd daemon and containerd are all working; docker --version and sudo systemctl status docker show the version and service status.
Why do I still get permission denied after adding my user to the docker group?
Group membership only takes effect at your next login. Log out of the server and back in, or run newgrp docker in the current session, to get access to /var/run/docker.sock.
Does ufw block Docker container ports?
No. Docker writes iptables rules directly for ports published with -p, and those rules are evaluated before ufw's. For internal services, publish the port on 127.0.0.1 only, or don't publish it at all.
Does uninstalling Docker delete images and data?
No. apt-get purge only removes the packages; images, containers and volumes remain in /var/lib/docker and /var/lib/containerd. To remove everything you have to delete those directories by hand, after taking a backup.
Wrap-up
- Install Docker from the official
download.docker.comrepository, not by piping unknown scripts. - Before installing, remove
docker.ioand similar packages so two versions don't conflict. - Verify the install with
docker run hello-world. - The
dockergroup is equivalent to root; only add trusted users. - Cap container log size, and publish internal ports on
127.0.0.1only, because Docker bypasses ufw.
The natural next step is running several services together; in Docker Compose explained we bring up a web app with PostgreSQL and Redis.